Free Addons & Tools

Premium software, tools, and services - completely free!

WinRAR Security Update WinRAR Attack Timeline WinRAR Attack Chain WinRAR Malicious Payload Hacker Groups Exploit Commoditization WinRAR Version Check

🚨 WinRAR's Critical Path Traversal Vulnerability Continues to Be Exploited by Hackers: You Must Upgrade Immediately!

In August 2025, renowned cybersecurity company ESET released a security report indicating a critical path traversal vulnerability (CVE-2025-8088) in the popular compression manager WinRAR. This vulnerability allows hackers to initialize access on a victim's system and deliver various malicious payloads.

In August 2025, renowned cybersecurity company ESET released a security report indicating a critical path traversal vulnerability (CVE-2025-8088) in the popular compression manager WinRAR. This vulnerability allows hackers to initialize access on a victim's system and deliver various malicious payloads.

Good News: Vulnerability is Patched!

Fortunately, thanks to ESET's proactive and responsible notification of this vulnerability, the WinRAR development team fixed the issue in version v7.13 released on July 30, 2025. Therefore, if you are using WinRAR v7.13 or later, you are not affected by this vulnerability.

Why is this vulnerability so dangerous?

Although the vulnerability has been patched, WinRAR lacks an automatic update function, resulting in a large number of users still using older versions. These outdated software versions have become a continuous target for hackers.

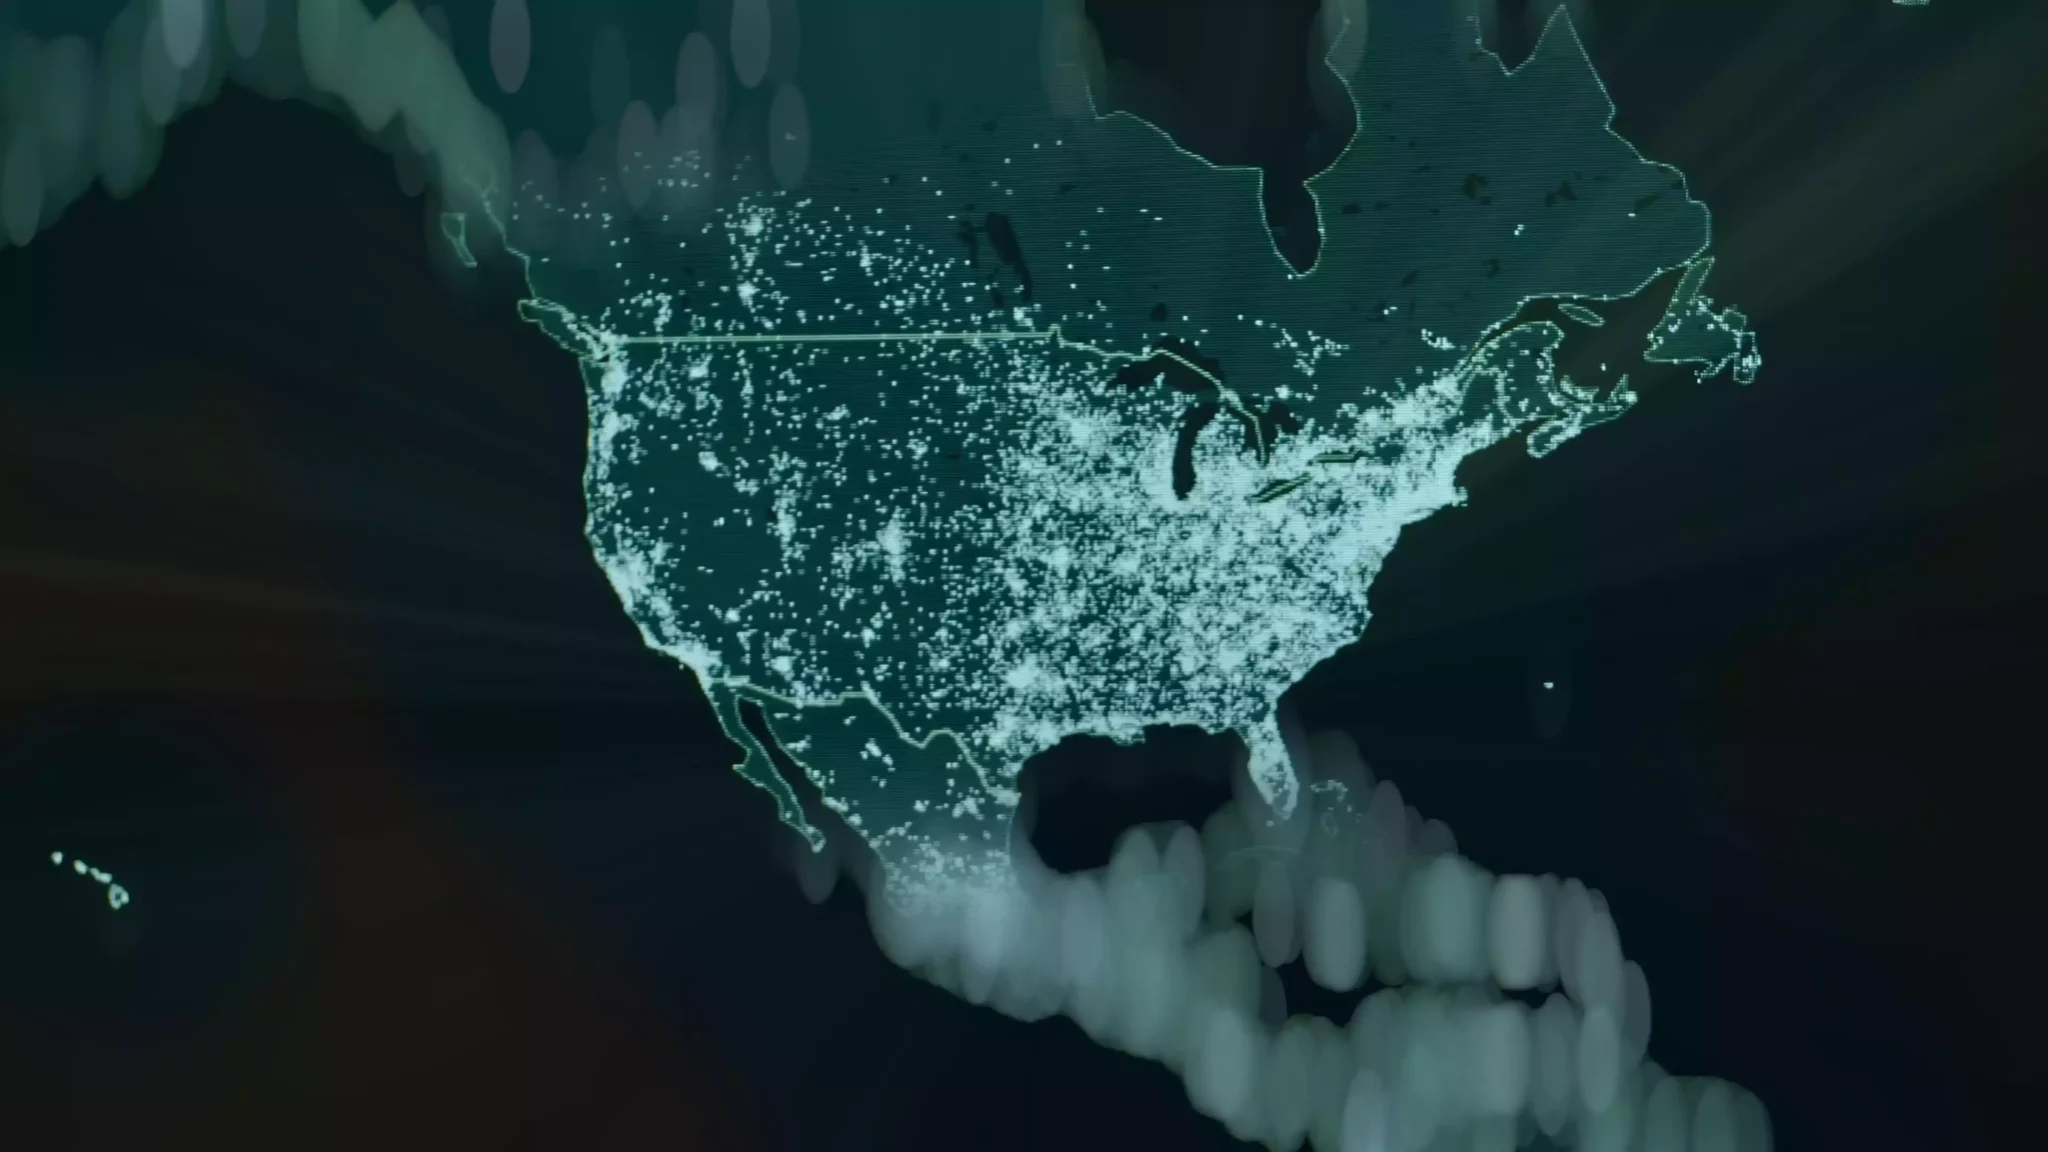
📊 Google Threat Intelligence Report

Attack Timeline and Scope

A recent report from Google's Threat Intelligence team indicates:

  • This attack on WinRAR began as early as July 18, 2025, and has not stopped since
  • The attackers include both state-sponsored espionage organizations and low-level cybercriminals driven by financial interests

How is the attack carried out?

Hacker attacks typically employ the following chain:

  1. Malicious files are hidden within compressed archives, for example, using Alternate Data Streaming (ADS) technology
  2. These archives are disguised as normal files, containing decoy content and a hidden malicious payload
  3. The vulnerability is triggered when a user opens or extracts these archives using WinRAR
  4. WinRAR, during path traversal, extracts the hidden malicious payload to an arbitrary location
  5. The generated malicious files typically include LINK, HTA, BAT, CMD, or other script files
  6. These script files are written to the system's startup directory or critical locations and execute upon system startup when the user logs in

Identified Hacker Groups

Google's threat intelligence team observed several active hacking groups, including but not limited to:

  • UNC4895
  • APT44
  • Turla

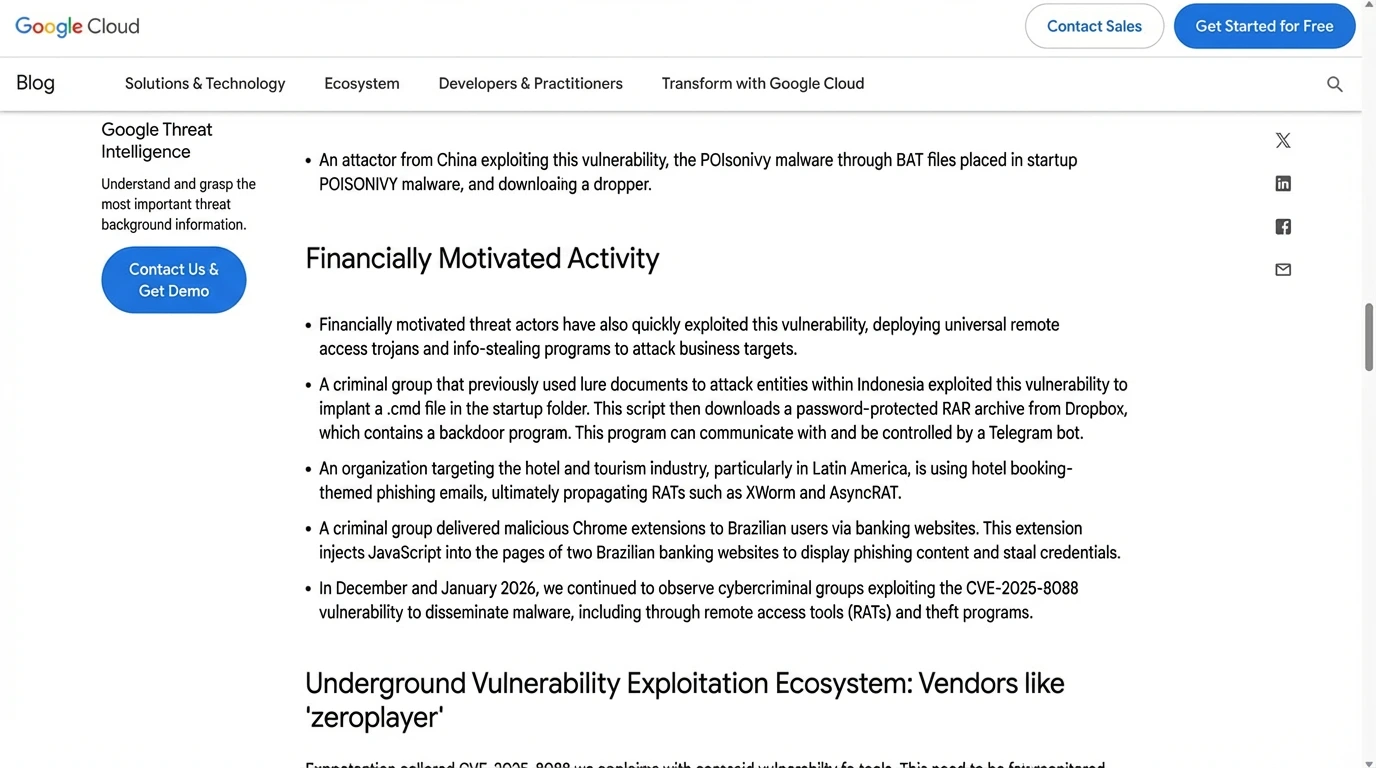
In addition, some hacking groups with financial interests are exploiting this vulnerability to:

  • Distribute malware
  • Steal sensitive user information
  • Distribute backdoor programs controlled by Telegram bots
  • Install malicious browser extensions to steal banking information

A more worrying trend: Commoditization of exploits

The report notes that these hackers appear to obtain exploits from specialized vulnerability vendors. For example:

  • A vendor codenamed ZeroPlayer advertised an exploit targeting WinRAR in July 2025

Google researchers commented that this commoditization of exploit development reflects a trend in the cyberattack lifecycle: the commoditization of exploits lowers the barrier and complexity for attackers to launch attacks, making any unpatched system vulnerable to attack in a short period of time.

What should you do?

In the face of ongoing attacks, do not take chances:

✅ Upgrade WinRAR Immediately

Visit the official latest version download page: Click here

  1. English version: Download
  2. Chinese version: Download

Download and install WinRAR v7.13 or later.

✅ Check Your Current Version

Open WinRAR, click "Help → About," and confirm that the version number is 7.13 or later.

❌ Avoid Risky Versions

Do not use old versions or portable versions from unknown sources. These versions usually do not include official content.

Download WinRAR v7.13 (English) Download WinRAR v7.13 (Chinese) Official Website

Critical security update • Protects against CVE-2025-8088 • Immediate upgrade required • Free download

Windows 7 Ultimate Interface BobPony Windows 7 Tweet Windows 7 Installation

🪟 In 2026, Someone is Still Updating Windows 7? The Most Ultimate Win7 Image in History is Here!

Windows 7 is the "white moonlight" in many people's hearts. Among all Windows versions released, Windows 7 has the highest appearance level, achieving a good balance between UI aesthetics and system smoothness!

Windows 7 is the "white moonlight" in many people's hearts. It must be said that among all Windows versions released, Windows 7 has the highest appearance level. Not only that, it achieved a good balance between UI aesthetics and system smoothness! Since its release in 2009, it has become one of the longest-used Windows systems for a generation due to its stability, smoothness, and strong compatibility.

Windows 7 Complete Lifecycle
  • July 2009: Windows 7 officially released
  • 2012: Windows 8 released, Win7 gradually moved to second line
  • October 2014: Stopped retail sales
  • January 2015: Ended mainstream support
  • January 2020: Terminated official maintenance
  • January 2023: Released last security update

That is, from an official perspective, Windows 7 has completely "retired."

The Most Ultimate Windows 7 x64 in 2026

This project comes from developer BobPony. In 2026, he repackaged a Windows 7 x64 image and gave it a very straightforward name: "The most ULTIMATE Windows 7 x64 ever"

View Original Tweet

🚀 Key Features

What Makes This Version Special?

The biggest feature of this version is: Letting Win7 install and run normally on modern hardware.

It includes:

  • ✅ All historical security update patches
  • ✅ USB 3 driver support
  • ✅ NVMe SSD support
  • ✅ Modern network card drivers
  • ✅ 35 system languages (including Simplified/Traditional Chinese)

Problems many people encountered when installing Win7 in the past, such as unresponsive keyboard/mouse, inability to recognize NVMe SSDs, unavailable USB3 interfaces, this version has already integrated these in advance.

Why is the Image Size So Large?

Many people are shocked at first glance:

  • Original Win7: About 3.1GB
  • Ultimate Win7: About 11.87GB

The volume directly tripled.

The reason is actually simple: The author pre-installed a large number of system language packs, supporting 35 languages in total, including Simplified Chinese, Traditional Chinese, English, Japanese, etc. If you don't need so many languages, you can delete them yourself after system installation to free up space.

Download Methods

  1. Network Disk Download: Click to go
  2. Torrent Download: Click to get

Installation Methods

  1. System USB Creation: Click to download (recommend USB drive at least 12G+)
  2. Virtual Machine Installation: Click to download Can install Windows 7 on Windows or Mac systems
Additional Tools:

Is the Image Safe? Can I Make It Myself?

Regarding security, it's also what everyone cares about most.

The author explained the production method in the project, using the old system packaging tool to reintegrate patches and drivers, rather than the arbitrarily modified "third-party simplified version."

That is to say: If you're worried about security issues, you can actually follow the author's method to package a Win7 Ultimate image yourself.

This way you have higher controllability and more peace of mind.

What's the Use of Installing Windows 7 in 2026?

To be honest, in 2026, Windows 7 is no longer suitable as a main system.

The truly valuable scenarios are mainly:

  • Nostalgia and Ancient Games: Like CS1.6, Red Alert, old single-player games, old online game clients,反而 more stable on Win7.
  • Compatible with Old Software: Some industrial software, financial software, old plugins only support Win7 environment.
  • Commercial Old Equipment: Industrial control computers, testing equipment, cash register systems - such equipment "don't replace if not broken."
  • Tinker Players: Pure experience, collection, testing system.

If you want to use it for video editing, running AI, making modern development environments, it's basically unrealistic. Browser, driver, and API support for Win7 is getting less and less.

Win7 is More About Nostalgia, Not the Future

Windows 7, for many people, is not just a system, but a memory.

But the reality is also clear: It has already exited the mainstream stage.

This "most ultimate Win7" is more like:

  • Leaving a way out for nostalgic players
  • Extending the life of old equipment
  • Giving tinkerers a toy

Rather than a solution for ordinary users to use long-term.

Download Windows 7 Ultimate Download Torrent Download Rufus

Modern hardware support • All security patches • 35 languages • USB 3/NVMe support • Nostalgia gaming

Oracle Cloud Free Server Oracle Cloud Speed Test

☁️ Permanent Free Oracle Cloud Server! One Card Can Register Multiple Accounts! Detailed Registration Tutorial Included!

Today I'll update everyone with the latest tutorial for registering Oracle Cloud servers in 2026. Even if you've registered and activated before, you can still continue to activate now!

Today I'll update everyone with the latest tutorial for registering Oracle Cloud servers in 2026. Even if you've registered and activated before, you can still continue to activate now!

Current Permanent Free Tier:
  • AMD CPU: Each account can create two permanent free VM.Standard.E2.1.Micro servers with fixed 1C/1G/50M bandwidth configuration, maximum 2 units, showing "Always Free" after creation
  • ARM: Can also create 1-4 ARM VM.Standard.A1.Flex servers with up to 4C/24G/4G bandwidth configuration, CPU and memory fixed ratio of 1:6, bandwidth same as CPU core count
  • Permanent Disk: Free disk quota of 200G
Foo IT Zone Latest Testing Results

According to Foo IT Zone's latest speed testing, even if you've previously registered and activated (permanent free) Oracle Cloud servers, you can still continue to activate new accounts now. This can achieve the effect of free region switching. Below is the experience summary of successfully registering 3 Oracle accounts:

  1. Registration name can be filled randomly (no verification needed)
  2. No real phone number needed, fill randomly
  3. Address and name for credit card verification can be filled randomly, just ensure card number, expiration date, and security code are real
  4. Ensure home broadband (no proxy), real credit card number, date, and security code, other information can be filled randomly!

🌍 Regional Registration Links

Different Regional Registration Links

Different regions have different registration page links for Oracle Cloud servers. Specific registration links are as follows:

More regions to be added later...

Required Tools

1. WindTerm (SSH) Remote Terminal Connector:

Official Download

2. Open Ports:

sudo iptables -P INPUT ACCEPT
sudo iptables -P FORWARD ACCEPT
sudo iptables -P OUTPUT ACCEPT
sudo iptables -F

3. One-Click Install WireGuard Proxy:

wget https://git.io/wireguard -O wireguard-install.sh && bash wireguard-install.sh

Performance Testing

Speed can fully utilize our home's gigabit broadband. I chose Melbourne node, speed is quite good.

Building websites is also very easy. Beginners can use the open source 1panel panel for one-click quick website server environment setup:

curl -sSL https://resource.1panel.pro/quick_start.sh -o quick_start.sh && bash quick_start.sh

Registration Tips

  • Multiple Accounts: One credit card can register multiple Oracle accounts
  • Information Accuracy: Only credit card details need to be real, other information can be random
  • Network Requirements: Use home broadband without proxy for registration
  • Region Selection: Choose appropriate region based on your location for better performance
  • Resource Limits: Each account gets specific free tier limits as mentioned above

Use Cases

  • Web Hosting: Perfect for personal websites and blogs
  • Development: Great for development and testing environments
  • VPN/Proxy: Set up personal VPN servers with WireGuard
  • Learning: Excellent for learning cloud computing and Linux administration
  • Small Projects: Ideal for small applications and APIs
Get Oracle Cloud Free (China) Get Oracle Cloud Free (Global) Download WindTerm

Completely free • Multiple accounts • High performance • Permanent free tier • Global regions

HeartMuLa AI Music Generation Results ComfyUI HeartMuLa Workflow

🎵 HeartMuLa: The Strongest Open Source Alternative to Suno AI! Free Offline Music Generation with Local Deployment + ComfyUI

The strongest open source alternative to Suno AI is here! This open source AI music model is the open source version of Suno AI! Can generate AI music locally and offline for free, with extremely low VRAM requirements

HeartMuLa: A series of open source music foundation models that can generate AI music locally and offline for free, with extremely low VRAM requirements. Currently the open source version is only 3B, which can adapt to most ordinary consumer graphics cards. We now provide a complete installation tutorial!

HeartMuLa Components:
  • HeartMuLa: A music language model that generates music based on lyrics and tags, supporting multiple languages including English, Chinese, Japanese, Korean, and Spanish
  • HeartCodec: A 12.5 Hz music codec with high reconstruction fidelity
  • HeartTranscriptor: A whisper-based model specialized for lyrics transcription
  • HeartCLAP: An audio-text alignment model that establishes a unified embedding space for music description and cross-modal retrieval

🛠️ Required Environment

Essential Software

  1. Git: Click to download
  2. Python 3.10: Click to download (officially recommended version)
  3. Conda: Click to download (recommend MiniConda, more streamlined and suitable)

Important: Don't choose the latest 3.13, it's not very compatible with AI projects. It's recommended to choose 3.10~3.12. After installation, add it to system environment, otherwise it cannot be used normally!

Complete Environment Package: Network disk download

Test installation: conda --version

Local Deployment Steps

Step 1: Clone Repository

git clone https://github.com/HeartMuLa/heartlib.git
cd heartlib
conda create -n heartmula python=3.10 # Create virtual environment
conda init
conda activate
conda activate heartmula # Activate and enter virtual environment
pip install -e .

Step 2: Download Pre-trained Models

Use the following commands to download pre-trained models and checkpoints from huggingface. Remember to enable global VPN with Tun mode for non-overseas users!

Create ckpt folder in heartlib root directory:

hf download HeartMuLa/HeartMuLaGen --local-dir ./ckpt
hf download HeartMuLa/HeartMuLa-oss-3B --local-dir ./ckpt/HeartMuLa-oss-3B
hf download HeartMuLa/HeartCodec-oss --local-dir ./ckpt/HeartCodec-oss

Step 3: Directory Structure

After download completion, the ./ckpt subfolder structure should be as follows:

./ckpt/
├── HeartCodec-oss/
├── HeartMuLa-oss-3B/
├── gen_config.json
└── tokenizer.json

Usage Example

To generate music, run:

python ./examples/run_music_generation.py --model_path=./ckpt --version="3B"

By default, this command will generate a piece of music based on lyrics and tags provided in the folder ./assets. The output music will be saved in ./assets/output.mp3.

All Parameters:
  • --model_path (required): Path to pre-trained model checkpoints
  • --lyrics Lyrics file path (default: ./assets/lyrics.txt)
  • --tags Tags file path (default: ./assets/tags.txt)
  • --save_path Output audio file path (default: ./assets/output.mp3)
  • --max_audio_length_ms Maximum audio length in milliseconds (default: 240000)
  • --topk Top-k sampling parameter during generation (default: 50)
  • --temperature Generation sampling temperature (default: 1.0)
  • --cfg_scale Classifier-free guidance level (default: 1.5)
  • --version HeartMuLa version, choose from [3B, 7B] (default: 3B) # 7B version not yet released

Important: Install triton module: Click to download or Network disk download, otherwise you'll get an error during generation saying the module is not loaded!

Lyrics and Tags Format

Recommended Lyrics Format:

[Intro]
[Verse]
The sun creeps in across the floor
I hear the traffic outside the door
The coffee pot begins to hiss
It is another morning just like this
[Prechorus]
The world keeps spinning round and round
Feet are planted on the ground
I find my rhythm in the sound
[Chorus]
Every day the light returns
Every day the fire burns
We keep on walking down this street
Moving to the same steady beat
It is the ordinary magic that we meet
[Verse]
The hours tick deeply into noon
Chasing shadows,chasing the moon
Work is done and the lights go low
Watching the city start to glow
[Bridge]
It is not always easy,not always bright
Sometimes we wrestle with the night
But we make it to the morning light
[Chorus]
Every day the light returns
Every day the fire burns
We keep on walking down this street
Moving to the same steady beat
[Outro]
Just another day
Every single day

Recommended Tags Format:

Separate different tags with commas, without spaces, as shown below:

piano,happy,wedding,synthesizer,romantic

ComfyUI Integration

Of course, we can also use it directly in ComfyUI, which is more suitable for beginners because it has a visual UI interface, making operations simpler and more efficient. You'll need this custom node or backup download, which is open source on GitHub community.

Step 1: Install Latest ComfyUI

Click to download

Step 2: Install Custom Node

Go to ComfyUI\custom_nodes in command prompt:

git clone https://github.com/benjiyaya/HeartMuLa_ComfyUI
cd HeartMuLa_ComfyUI
pip install -r requirements.txt

If no module name error pops up, some libraries may need to be installed separately (Windows users need to use command prompt as administrator):

pip install soundfile
pip install torchtune
pip install torchao

Step 3: Download Model Files

Go to ComfyUI/models directory. Use HuggingFace CLI to download model weights:

hf download HeartMuLa/HeartMuLaGen --local-dir ./HeartMuLa
hf download HeartMuLa/HeartMuLa-oss-3B --local-dir ./HeartMuLa/HeartMuLa-oss-3B
hf download HeartMuLa/HeartCodec-oss --local-dir ./HeartMuLa/HeartCodec-oss
hf download HeartMuLa/HeartTranscriptor-oss --local-dir ./HeartMuLa/HeartTranscriptor-oss

Step 4: Download Workflow

Click to go or backup download

Finally, load the workflow and you can generate AI music in ComfyUI!

Get HeartMuLa on GitHub Get ComfyUI Custom Node Download ComfyUI

Completely free • Local deployment • Low VRAM requirements • Open source • Multi-language support

ChatGPT GO Free Membership Urban VPN Setup ChatGPT GO Free Trial ChatGPT GO Free Plan Selection ChatGPT GO Payment Success OCI Firewall Configuration OpenVPN Setup

🆓 Get Free 1-Year ChatGPT GO Membership & How to Keep It Active

Complete guide to get free ChatGPT GO 1-year membership and maintain it without cancellation

Do you also want to get free 1-year ChatGPT GO membership, unlock more powerful AI assistant, but don't know where to start? Actually, many people have seen Baidu's tutorials before, can get free ChatGPT GO annual meal through VPN and changing location, and through PayPal account. But after using it for a few days, it gets cancelled. Why is this?

Today I'll help everyone solve this problem

We'll use the latest method to test, see if we can get free 1-year ChatGPT GO membership without PayPal account! At the same time, I'll introduce the usual precautions for daily use!

🌍 Step 1: Switch to Indian IP Address

Why Indian IP is Required

We need to prepare an Indian VPN, this is an essential prerequisite. Click here to install free Indian node VPN. Of course, to increase availability, it's recommended to use paid VPN Click here to get Surfshark.

They both have mobile apps, direct installation is more convenient!

Step 2: Register on ChatGPT Official Website

After switching to Indian IP, then enter ChatGPT official website, you can register a new account, or use an old account (Foo IT Zone uses an old account).

After entering, you can see free trial ChatGPT for 12 months at the top, you can see "Free Gift" or "Activate Plus" prompt, click to see the following page:

Step 3: Select GO Plan

Choose GO meal, original price is 399 rupees but now it's 0 rupees,说明 you can enjoy this 1-year discount package. If you don't see the above page, it means your IP address is not pure enough, or your ChatGPT is a new account,建议 changing account to try. It's recommended to use UnionPay credit card,建议 using your real card (doesn't need to be Indian), also no need to switch regions, activate directly!

Important Notes for Stability

To avoid being cancelled like before, using it for a few days and then GO membership gets cancelled, so a stable Indian node VPN is essential. Whether you're on PC or mobile, when using ChatGPT GO paid account, always keep the Indian node VPN connected. Free is certainly nice, but unstable, so you can choose paid VPN, need to have Indian nodes, such as Surfshark or ProtonVPN both are available! They both have mobile apps, direct installation is more convenient!

Or you can be like me, have a permanent free Oracle Cloud Server, then deploy OpenVPN or WireGuard inside, you can permanently get a free Indian proxy node.

🛠️ Alternative: Free Oracle Cloud Server Method

OpenVPN One-Click Installation

wget https://git.io/vpn -O openvpn-install.sh && bash openvpn-install.sh

OCI Firewall Port Configuration

In OCI console, add to Network Security Group (NSG) or Security List:

  • Protocol: UDP
  • Port: 51820
  • Source: 0.0.0.0/0

Or directly open all ports to save trouble each time!

Ubuntu System Configuration

Open all ports:

iptables -P INPUT ACCEPT
iptables -P FORWARD ACCEPT
iptables -P OUTPUT ACCEPT
iptables -F

Ubuntu mirror sets iptables rules by default, disable it:

apt-get purge netfilter-persistent
reboot

Or force delete:

rm -rf /etc/iptables && reboot

WireGuard Installation (Better Security)

Or install WireGuard, security encryption is better, suitable for special users:

Ubuntu / Debian:

apt update
apt install -y wireguard qrencode

Generate Keys

wg genkey | tee server_private.key | wg pubkey > server_public.key
wg genkey | tee client_private.key | wg pubkey > client_public.key

View public keys:

cat server_public.key
cat client_public.key

View private keys:

cat server_private.key
cat client_private.key

Server Configuration

Create configuration file:

sudo nano /etc/wireguard/wg0.conf

[Interface]
Address = 10.8.0.1/24
ListenPort = 51820
PrivateKey = server private key content
PostUp = iptables -A FORWARD -i wg0 -j ACCEPT; iptables -A FORWARD -o wg0 -j ACCEPT; iptables -t nat -A POSTROUTING -o eth0 -j MASQUERADE
PostDown = iptables -D FORWARD -i wg0 -j ACCEPT; iptables -D FORWARD -o wg0 -j ACCEPT; iptables -t nat -D POSTROUTING -o eth0 -j MASQUERADE

[Peer]
PublicKey = client public key content
AllowedIPs = 10.8.0.2/32

Note: Modify the network card inside: eth0 (everyone's is different). eth0 might not be your network card name, you can use ip a to check (OCI is usually ens3 or enp0s3).

If it's ens3, please change all eth0 above to ens3.

Enable IP Forwarding

sudo nano /etc/sysctl.conf

Uncomment or add:

net.ipv4.ip_forward=1

Then execute:

sudo sysctl -p

Start WireGuard Service

sudo systemctl enable wg-quick@wg0
sudo systemctl start wg-quick@wg0

Client Configuration (Windows / iOS / Android / macOS)

Client configuration example:

[Interface]
PrivateKey = client private key
Address = 10.8.0.2/32
DNS = 1.1.1.1
[Peer]
PublicKey = server public key
Endpoint = your server public IP:51820
AllowedIPs = 0.0.0.0/0
PersistentKeepalive = 25

Get Urban VPN (Free) Get Surfshark (Paid, More Stable) Get Free Oracle Cloud Server

Completely free • Stable connection • No PayPal required • Permanent solution

GLM-4.7 and MiniMax M2.1 Models NVIDIA NIM Registration API Key Generation Cherry Studio Interface NVIDIA Model Configuration Model Management Model Addition Helicopter Battle Game

Free Top-Tier Models! GLM-4.7 + MiniMax M2.1 Free API - Comparable to Claude Code!

Latest news! NVIDIA secretly provides two top-tier programming models GLM-4.7 and MiniMax M2.1 for free

Latest news! NVIDIA has secretly provided two top-tier programming models GLM-4.7 and MiniMax M2.1. Now you just need to register a regular account to happily call the API, and the key is it's free! Currently there are no restrictions, don't miss out if you need this, get on board quickly! If you don't have access to external networks, then this is the best alternative to Claude and GPT models.

Key Features:
  • GLM-4.7: Recently very popular in programming circles, many people evaluate that its code capabilities have entered the first tier
  • MiniMax M2.1: Known for multi-language engineering capabilities, considered able to challenge many closed-source models
  • Completely Free: No API limits discovered yet, just register and use
  • NVIDIA NIM Platform: Official NVIDIA infrastructure for stable API access
  • Cherry Studio Integration: Easy integration with unified model management interface
How to Use:
Step 1: Register NVIDIA NIM Account

Register for a free NVIDIA NIM account:

Go to NVIDIA NIM

After logging in, generate your own API Keys in the settings center. Select "Never Expires" for expiration time. Currently can be called directly for free, no limits discovered yet.

Step 2: Use Cherry Studio to Call API

Call API through Cherry Studio to easily achieve: Intelligent Dialogue · Autonomous Agent · Unlimited Creation, unified access to mainstream large models!

Go to Cherry Studio
Step 3: Add Custom Service Provider
  1. Install and start Cherry Studio, then click "Settings" (gear icon) at the top
  2. Select "Model Services" on the left side
  3. Find "NVIDIA" models in the dropdown on the right
  4. Fill in the API Key you obtained from NVIDIA on the right
Step 4: Add Models

Click the "Manage" button at the bottom, manually add these two models:

z-ai/glm4.7

minimaxai/minimax-m2.1

Just copy the model names above and search in the management to add the models.

Actual Model Capability Testing
Live Status App - "Alive or Not" Demo

For example, I asked it to help me write a web application similar to the currently very popular app "Dead or Not" called "Alive or Not" with the following prompt:

Prompt:

You are a senior full-stack engineer + product manager + UI designer. Please design and generate a complete web application called "Alive or Not". This is an "existence confirmation + status synchronization" application where users check in once a day to tell relatives and friends: I'm still alive, I'm still okay.

The model generated a complete application with:

  • Frontend: HTML + CSS + JavaScript (or Vue/React optional)
  • Backend: Node.js + Express
  • Database: SQLite or JSON local storage (for demo)
  • Email notifications: SMTP example interface
  • Standalone runnable Demo

Core features included:

  • User registration/login with email/phone
  • Daily check-in system with consecutive days tracking
  • Status publishing (Great, Okay, Tired, Need Contact)
  • Friends/family following system with notifications
  • Notification system with email/SMS templates
  • Personal dashboard with 7-day history and trends
  • Backend logic with heartbeat detection and automated reminders

UI requirements: minimalist style, warm feel, premium look, gradient backgrounds, soft light effects, breathing animations, mobile responsive.

The model provided complete project structure, frontend core pages, backend core logic, database structure, startup instructions, all code was complete and runnable with necessary comments.

Also included a helicopter battle game with completely free creative expression, the effect was quite stunning!

Register NVIDIA NIM Account Download Cherry Studio

Completely free • No API limits • Top-tier models • Claude/GPT alternative

LTX-2 AI Video Generation LTX-2 Video Generation Demo LTX-2 Asian Character Generation LTX-2 ComfyUI Setup ComfyUI Interface VPN Setup

LTX-2: 8GB VRAM "All-in-One" AI Video Generation Model - Even Beginners Can Master It!

First DiT-based audio-video foundation model with synchronized audio and video generation, high fidelity, multiple performance modes, and production-ready outputs

Recently, the AI video community has been dominated by one name - LTX-2. It's not only completely free and open-source, but also packs the most cutting-edge video generation capabilities into a single model. LTX-2 is the first DiT-based audio-video foundation model that integrates all core functions of modern video generation: synchronized audio and video, high fidelity, multiple performance modes, production-ready outputs, API access, and open access!

Key Features:
  • 8GB VRAM Support: Home graphics cards can run local generation, no queuing, no cloud dependency, no speed limits - generate as much as you want!
  • First True "Video Generation Factory": For the first time, ordinary people truly have their own video generation factory
  • Unrestricted Local Generation: Can generate those "veteran driver" AI videos locally without any restrictions
  • Perfect Chinese Understanding: Extremely accurate understanding of Chinese prompts, generated characters perfectly match Asian aesthetic standards
  • DiT Architecture: Based on latest Diffusion Transformer technology for superior video quality
  • 100% Open Source: Unlimited generation, no content restrictions, no commercial licensing fees
Why LTX-2 is Revolutionary:
True "All-in-One" Model

LTX-2 is not just another AI model - it's the first truly "all-in-one" AI video generation model. Unlike others that can only generate video without sound, or have mismatched audio/video, or require ridiculous hardware specs, LTX-2 delivers synchronized audio + video + high quality + local deployment + low requirements.

Multiple Performance Modes

Extreme Mode: For maximum quality output
VRAM-Saving Mode: Optimized for 8GB graphics cards
High-Speed Mode: For quick drafts and prototyping

Local Deployment is the Ultimate Game-Changer

No queuing, no cloud dependency, no speed limits, no billing, no account bans. Just your graphics card + your model + unlimited video creation capability. This is true freedom for creators.

Quick Deployment Options:
🚀 One-Click ComfyUI Deployment (Recommended for Beginners)

Super convenient one-click deployment with ComfyUI latest version!

Download ComfyUI

🔧 Manual GitHub Setup

Clone Repository: git clone https://github.com/Lightricks/LTX-2.git
Setup Environment: cd LTX-2 && uv sync --frozen && source .venv/bin/activate

Required Models & Components:
📦 LTX-2 Model Checkpoint (Download One)

ltx-2-19b-dev-fp8.safetensors - Download
ltx-2-19b-dev.safetensors - Download
ltx-2-19b-distilled.safetensors - Download
ltx-2-19b-distilled-fp8.safetensors - Download

🔍 Essential Upscalers

ltx-2-spatial-upscaler-x2-1.0.safetensors - Required for current two-stage pipeline
ltx-2-temporal-upscaler-x2-1.0.safetensors - Supported for future pipeline implementation
ltx-2-19b-distilled-lora-384.safetensors - Simplified LoRA (required for current pipeline except DistilledPipeline and ICLoraPipeline)

📝 Text Encoders

Gemma 3 LoRA - Download all resources from HuggingFace repository
Control Models: Canny, Depth, Detailer, Pose, Camera Control (Dolly In/Out/Left/Right/Up/Down/Jib/Static)

Available Pipelines:
🎬 TI2VidTwoStagesPipeline

Production-grade text/image-to-video, supports 2x upscaling (recommended)

⚡ TI2VidOneStagePipeline

Single-stage generation for rapid prototyping

🔥 DistilledPipeline

Fastest inference with only 8 predefined sigma values (8 steps first stage, 4 steps second stage)

🔄 ICLoraPipeline

Video-to-video and image-to-video conversion

⚡ Optimization Tips:
Performance Optimization

Use DistilledPipeline: Fastest inference with 8 predefined sigma values
Enable FP8: Reduce memory usage with --enable-fp8 (CLI) or fp8transformer=True (Python)
Attention Optimization: Use xFormers (uv sync --extra xformers) or Flash Attention 3 for Hopper GPUs
Gradient Checkpointing: Reduce inference steps from 40 to 20-30 while maintaining quality
Skip Memory Cleanup: Disable automatic memory cleanup between stages if you have sufficient VRAM

Model Selection

8GB VRAM Models: Download KJ's Optimized Models
Choose ltx-2-19b-distilled_Q4_K_M.gguf (recommended) or ltx-2-19b-distilled_Q8_0.gguf
VAE Models: Download KJ's VAE

Test Prompts & Examples:
1️⃣ Chinese Couple Conversation (Lip Sync + Emotion Test)

A 20-year-old Asian couple sitting in a café, girl smiling and speaking Mandarin: "Do you still remember when we first met?" Boy nods gently, replying in Mandarin: "Of course I remember, you were wearing a white dress that day, I fell for you at first sight." Natural lighting, realistic photography style, slight camera movement, perfect lip sync with audio.

2️⃣ Comedy Couple Short Drama

Asian young couple arguing at home, girl speaking Mandarin angrily: "You forgot to do the dishes again!" Boy looks innocent, replying humorously: "I didn't forget, I was waiting for inspiration!" Light comedy style, exaggerated but natural expressions, lip sync, fast rhythm.

3️⃣ Gaming Live Stream Style

First-person shooter game footage, player fighting in city ruins while commenting in Mandarin: "This gun's recoil is too strong, but the damage is really high, I need to circle around from the right." Smooth gameplay, gun sounds sync with audio, slight game HUD.

🔟 AI Sci-Fi Dialogue

Futuristic sci-fi lab, Asian female scientist speaking Mandarin: "Do you really think you have emotions?" Humanoid robot responding calmly in Mandarin: "I am learning to understand human emotions." Cold-toned lighting, sci-fi movie style.

Why LTX-2 is the Turning Point:
🎯 The True Democratization of AI Video

LTX-2 represents the first true "civilian-grade" AI video generation. It delivers synchronized audio + video + high quality + local deployment + low hardware requirements. This breaks the barrier between professional tools and everyday creators, making unlimited video generation accessible to everyone with just 8GB VRAM.

For short videos, social media, animation, YouTube, TikTok, or just experimenting with AI video - LTX-2 is currently the best value proposition in the market.

Download LTX-2 from GitHub Get ComfyUI (Recommended) Download Optimized Models

Completely free • Open source • 8GB VRAM support • Unlimited generation

Meta SAM 3D Interface AR Shopping Demo Medical Rehabilitation Movement Analysis Robotics Application

Meta Releases Open Source Blockbuster: SAM 3D Officially – Turn Any Photo or Video into Real 3D!

Meta's revolutionary 3D visual reconstruction system that transforms ordinary 2D images and videos into realistic 3D models

Just a few days ago, Meta officially released and open-sourced a model that is poised to revolutionize the entire AI and 3D industry – SAM 3D.

Key Features:
  • 3D Visual Reconstruction: Directly reconstruct usable 3D models from single images or videos
  • Dual-Component System: SAM 3D Body for human pose reconstruction and SAM 3D Objects for general objects
  • Professional-Grade Quality: Realistic, usable, renderable, and interactive 3D models
  • Open Source: Completely free and available for developers, enterprises, and researchers
  • Industry-Leading Performance: Surpasses current state-of-the-art solutions in benchmark tests
What is SAM 3D?
Revolutionary 3D Visual Reconstruction System

SAM 3D is a 3D visual reconstruction system that Meta has upgraded based on its classic Segment Anything Model (SAM). It's not simply about "identifying objects from images," but rather directly reconstructing usable 3D models, poses, and spatial structures from a single image or video.

Two Main Components

SAM 3D Body: Focuses on 3D pose, motion, skeleton, and mesh reconstruction of the human body
SAM 3D Objects: Used to recreate various objects in the real world, such as furniture, tools, and electronic products

The Difference from Traditional 3D Modeling

Before SAM 3D: Professional 3D scanner, LiDAR, multi-angle photography + manual modeling, expensive software and complex processes
With SAM 3D: 📸 Give me an ordinary photo → I give you a realistic and usable 3D world

Applications & Use Cases:
🛍️ AR Shopping: Bringing Products "Into Your Home"

Merchants upload product photos → SAM 3D generates 3D models → You open AR on your phone → Place it directly in your living room. This upgrades e-commerce from "ordering based on images" to "ordering after a real preview."

🏥 Medical and Rehabilitation: AI Understands Your Every Move

SAM 3D Body can reconstruct human skeleton from video, identify joint angles, and analyze movement standards. AI acts like a "virtual therapist," monitoring movement correctness in real time for improved rehabilitation accuracy.

🤖 Robotics: Truly Learning to "Grasp Anything"

SAM 3D Objects provides robots with complete 3D object outlines, surface shapes, and grasping point positions, enabling precise grasping, slip avoidance, and gravity determination - evolving from "robotic arms" to "intelligent agents that understand the world."

Technical Architecture:
SAM 3D Body: Transformer Architecture

Meta uses a 3D pose regression system based on a Transformer encoder-decoder architecture. Input: Ordinary image → Output: 3D human body mesh + pose parameters. It doesn't predict keypoints, but directly predicts the complete 3D human body model.

SAM 3D Objects: Two-Stage DiT Architecture

The object model uses a two-stage Diffusion Transformer (DiT):
Stage 1: Generates 3D shape and pose of the object
Stage 2: Refines textures and geometric details
This makes the final generated model realistic, useful, renderable, and interactive.

Performance & Benchmarks:
Industry-Leading Results

In multiple international 3D reconstruction and pose benchmark tests, both SAM 3D models surpassed the current state-of-the-art open-source and commercial solutions, delivering higher accuracy, better stability, and stronger handling of occlusion and complex scenes.

Open Source Impact:
Revolutionary Open Source Release

This isn't just good news for ordinary users; it's an earthquake for the entire industry. Open source means developers can directly integrate it, enterprises can customize it, entrepreneurs can build products based on it, and students can study it for free.

Future applications include 3D search engines, AI spatial modeling, AR shopping platforms, and virtual world generators - all built on SAM 3D.

Download Meta SAM 3D View on GitHub

Completely free • Open source • Professional-grade • Revolutionary 3D technology

MyTV Android Interface MyTV Android Features MyTV Android Screenshots

Android TV viewing神器 (magical tool)! Massive live TV sources, high-definition and smooth playback, ad-free, free and open source, quick deployment!

Currently the best Android TV live TV software with comprehensive features and customization options

My TV Live TV software developed using native Android

Key Features:
  • Massive Live TV Sources: Extensive collection of live TV channels from around the world
  • High-Definition Playback: Supports HD and 4K content with smooth video quality
  • Ad-Free Experience: No advertisements or interruptions during viewing
  • Free & Open Source: Completely free to use with open-source code available
  • Quick Deployment: Easy installation and setup process
1. Live TV Software Download:
mytv-android Currently the best Android TV live TV software

My TV Live TV software developed using native Android

2. Live Streaming Software APK + Live Streaming Source + TV Assistant Package Download:

Click to Download

Includes Live Streaming Software, Live Streaming Sources, and TV Assistant Package

Live Streaming Software Installation:
  1. Install directly via USB flash drive
  2. Install remotely via Happy TV Assistant
Operation Method:
Remote Control Operation

Remote control operation is similar to mainstream live TV software

Channel Switching

Use up and down arrow keys or number keys to switch channels; swipe up and down on the screen

Channel Selection

OK button; single tap on the screen

Settings Page

Press menu or help button, long press the OK button; double tap, long press on the screen

Touch Key Correspondence:

Arrow Keys: Screen swipe up, down, left, and right on the screen
OK button: Tap on the screen
Long press OK button: Long press on the screen
Menu/Help button: Double-tap on the screen

Custom Settings
Access URL

Access the following URL: http://<device IP>:10481

Open application settings interface and move to the last item

Supports custom live stream sources, custom program schedules, cache time, etc.

Note:

The webpage references jsdelivr's CDN; please ensure it can be accessed normally.

Custom Live Stream Source
Settings entry

Custom settings URL

Supported formats

m3u format, TVbox format

Multiple Live Stream Sources
Settings entry

Open the application settings interface, select the custom live stream source item, and a list of historical live stream sources will pop up.

Historical Live Stream Source List

Short press to switch to the current live stream source (requires restart), long press to clear history; this function is similar to multi-warehouse, mainly used to simplify live stream source switching.

Notes

When live stream data is successfully acquired, it will be saved to the historical live stream source list. When live stream data acquisition fails, it will be removed from the historical live stream source list.

Multiple Lines
Function Description

Multiple playback addresses are available for the same channel; relevant identifier is located after the channel name.

Switching Lines

Use left and right arrow keys; swipe left and right on the screen.

Automatic Switching

If the current line fails to play, the next line will automatically play until the last one.

Notes

When a line plays successfully, its domain name will be saved to the playable domain name list. When a line fails to play, its domain name will be removed from the playable domain name list.

Custom Playlist
Settings Entry

Open the application settings interface, select the "Custom Program Schedule" option, and a historical program schedule list will pop up.

Supported Formats

.xml, .xml.gz formats

Multiple Programs Single
Settings Entry

Open the application channel selection interface, select a channel, press the menu button, help button, or double-tap on the screen to open the current day's program schedule.

Note

Since this application does not support replay functionality, earlier program schedules are unnecessary to display.

Channel Favorites
Function Entry

Open the application channel selection interface, select a channel, long press the OK button, long press on the screen to favorite/unfavorite the channel.

Toggle Favorites Display

First, move to the top of the channel list, then press the up arrow key again to toggle the favorites display; long press on the channel information on the phone to switch.

Download
Function

You can download via the release button on the right or pull the code to your local machine for compilation.

Description
Mainly solves...

my_tv (Flutter) experiences stuttering and frame drops when playing 4K videos on low-end devices.

Only supports

Android 5 and above. Network environment must support IPv6 (default live stream source).

Tested only on

my own TV; stability on other TVs is unknown.

Features:
Channel Reversal
Digital Channel Selection
Program Guide
Auto-Start on Boot
Automatic Updates
Multiple Live Stream Sources
Custom Live Stream Sources
Multiple Lines
Custom Live Stream Sources
Multiple Program Guides
Custom Program Guides
Channel Favorites
Application Custom Settings
Update Log
IPv6 Enabled:
Check IPv6 Support

Click to Check

Fan Mingming Live Stream Source Github Project:
Custom Program Guide:

http://epg.51zmt.top:8000/e.xml.gz

2. Happy TV Assistant [Latest Version]:
Happy TV Assistant Interface

Happy TV Assistant [Latest Version] - An essential tool for Android TVs!

Download Happy TV Assistant

Click to Download

Update List

0x01 Fixed an unknown error issue caused by Chinese characters in the path
0x02 Added support for Rockchip chips

Version 6.0 Update Notes:
0x01

Rewrote core code, compatible with Android versions 4.4-14

0x02

A brand-new application manager that displays application icons, more accurately shows application installation locations, adds one-click generation of simplified system scripts, and exports all application information

0x03

Optimized custom script logic, making it easier to add custom scripts, and added backup functionality for Hisilicon, Amlogic, MStar, and Guoke chips

0x04

Updated screen mirroring module, supporting fast screen mirroring from mainstream TVs, projectors, and set-top boxes, with customizable screen mirroring parameters

0x05

Updated virtual remote control module, which can run independently

0x06

The software requires Visual C++ 2008 runtime library and .NET Framework 4.8.1 runtime environment to function properly, and only supports Windows 7 and above 64-bit systems

Download MyTV Android from GitHub Download Complete Package

Completely free • Open source • High definition • Ad-free

Z-Image Turbo Interface ComfyUI Interface VPN Setup Workflow Setup Online Platform

Z-Image Turbo Local Installation Tutorial! This recently popular text-to-image AI model, how good is it really?

Open-source text-to-image model with Chinese support, no censorship, and low memory requirements

Today, we'll share how to run Z-Image Turbo locally. This is an open-source text-to-image model that supports Chinese image text, has no censorship restrictions, and can generate NSFW content. It has low memory requirements—only 8GB is needed to run it—and crucially, it's extremely fast!! The official website also provides a local deployment solution. All you need is ComfyUI + the official Workflow workspace; it's easy to get started on both Windows and Mac!

Key Features:
  • Chinese Text Support: Native support for Chinese text in image generation
  • No Censorship: unrestricted content generation including NSFW
  • Low Memory: Only 8GB RAM required to run
  • Extremely Fast: Optimized for speed and efficiency
  • Cross-Platform: Works on Windows and Mac
Installation Methods:
1. No-Installation Deployment (One-Click Installation Package)

If you don't have time to read tutorials, don't want to manually download and install, or your network environment doesn't allow it, you can choose to directly open the model integration package below for no-manual deployment.

Z-Image Model Integration Package Download

2. Manual Deployment

Preparation Before Deployment:

Step 2: Install the latest version of the ComfyUI client

Note

Currently, Windows supports NVIDIA cards and CPU decoding. The Mac version is limited to M-series chips. If you have an AMD card, you can only decode via CPU. Output is supported, but input will be significantly reduced!

Due to ComfyUI... The official client requires an external network connection to download the necessary environment installation packages and AI models. If you are unable to download them,

you can use a secure encrypted VPN: Click to download, and then enable TUN global mode!

Step 3: Obtain the Workflow

Click to download the Raw Image Workflow or the Alternative Download. Then scroll down to find the "Download JSON Workflow File" button. If you press this button, it will directly open the JSON file (which displays a bunch of code). Right-click and save it to your desktop.

After downloading the workflow, drag it into the ComfyUI workspace. It will prompt you to download and install the necessary AI models. Once the download and installation are complete, you can use it!

Of course, if your computer hardware is not up to standard, you can use a free online platform, such as one hosted on Huggingface. It's completely free, but during peak hours, there may be a queue due to high usage.

Click to go - Z-Image Turbo Free Online Platform

Raw Image Tips:
⭐ Realistic Portrait Style (Natural Light, High-Quality Look)

A super realistic photo of an East Asian beauty. Her skin is naturally smooth, dark and lustrous, with a sweet smile. The warm and soft ambient lighting creates a cinematic portrait effect. The photo uses shallow depth of field, rich detail in the eyes, 8K ultra-high-definition resolution, photo-realistic feel, professional photography, extremely clear facial details, perfect composition, softly blurred background, and a fashionable, high-fashion style.

🌸Sweet Japanese Style

Adorable Japanese girl, dressed in casual school uniform style, soft pastel tones, sweet smile, delicate makeup, brown eyes, fluffy hair, bright sunlight, extremely cute aesthetic, magazine cover style, delicate skin texture, clear facial features, perfect lighting, HDR

💄Korean Cool and High-End Style

Korean fashion model, elegant and simple beauty, smooth straight hair, moist lips, perfectly symmetrical face, neutral studio lighting, Vogue-style photography techniques, delicate makeup, sharp eyes, high-end portrait lens effects, ultra-high definition image quality, fashionable and modern styling

🔥 Special Content:

Beautiful adult East Asian woman, sensual artistic portrait, soft warm lighting, delicate skin texture, alluring eyes, subtle seductive expression, elegant pose, smooth body curve, fashion lingerie style, cinematic shadow, high-resolution photography, detailed composition, intimate mood, magazine photoshoot

Try Online Demo Download Integration Package View Tutorial

Completely free • Open source • Chinese support • No censorship • Low memory requirements

WindTerm Interface WindTerm Features

WindTerm - Free and Open-Source SSH Remote Terminal Connector!

Currently the most feature-rich and user-friendly SSH remote terminal connector

WindTerm is a powerful, free, and open-source terminal emulator that supports multiple protocols including SSH, Telnet, TCP, Shell, and Serial connections. Perfect for managing servers and working with remote systems.

Official Download

https://github.com/kingToolbox/WindTerm/releases/tag/2.5.0

Features: SSH, Telnet, TCP, Shell, Serial

Key Features
Protocol Support

Implements SSH v2, Telnet, Raw TCP, Serial, and Shell protocols with comprehensive authentication support.

  • SSH automatic authentication during session verification
  • SSH ControlMaster, ProxyCommand or ProxyJump support
  • SSH proxy and automatic login with password, public key, keyboard interaction, and gssapi-with-mic
  • X11 forwarding and port forwarding (direct/local, reverse/remote, dynamic)
File Management

Integrates SFTP and SCP clients with comprehensive file operations.

  • Downloading, uploading, deleting, renaming, and creating files/directories
  • Integrated local file manager with full file operations
  • XModem, YModem, and ZModem support
Shell Support

Supports multiple shell environments across different operating systems.

  • Windows: Cmd, PowerShell, and Cmd/PowerShell as administrators
  • Linux: bash, zsh, PowerShell core, etc.
  • macOS: bash, zsh, PowerShell core, etc.
Graphical User Interface

Feature-rich GUI with extensive customization options.

  • Multi-language support and Unicode 13 compatibility
  • Session dialog boxes, session tree, and autocomplete
  • Freestyle typing mode, focus mode, and synchronized input
  • Command palette, command sender, and explorer pane
  • Vim key bindings with Shift+Enter to switch between remote/local modes
  • VS Code-like color schemes and UI theme customization
Download WindTerm View on GitHub

Completely free • Open source • Cross-platform • High performance

Dark Web Site Setup

How to Set Up a Dark Web Site? How Mysterious is the Deep Web? Actually…

Complete guide to setting up your own .onion website on the Tor network

How to set up a dark web site? The mystery of the deep web is intriguing. In fact, the dark web is not necessarily illegal; it refers to areas of the internet inaccessible through regular search engines. To set up a dark web website, you typically need to use the Tor network. First, you need to configure a hidden service, set a .onion address, and deploy a web server such as Nginx or Apache.

The deep web does indeed hide a lot of mysterious content, including forums, intelligence exchange sites, and encrypted communication services, but it is also rife with illegal transactions. Exploring the deep web requires caution; never cross the line into illegality, and always maintain your initial passion for technological exploration.

Setup Steps:
  1. You need a VPS or server. You can use a free one or purchase one yourself. If you don't have one, you can get one yourself Click here.
  2. Activate the VPS and connect using WindTerm remote connection tool Click to download
  3. Install the tor service. Execute the following installation command:
    apt-get install tor
  4. Configure tor service. In /etc/tor/torrc, remove the '#' symbol before the following code and modify the reverse proxy port 80:
    #HiddenServiceDir /var/lib/tor/hidden_service/
    #HiddenServicePort 80 127.0.0.1:8888
  5. Restart the tor service (note that SELinux must be disabled first):
    service tor restart
    This will generate your own dark web domain in the /var/lib/tor/hidden_service file. It's completely free and you can generate it freely!
    dmr66yoi7y6xwvwhpm2qzsyboiq5n4at5d4frwaid25z64kwqs5hbqyd.onion
  6. Deploy the website server environment. Experienced users are recommended to deploy manually. However, for beginners, to reduce the difficulty, you can choose to install a server panel, such as the open-source 1panel panel. The one-click deployment command is as follows:
    bash -c "$(curl -sSL https://resource.fit2cloud.com/1panel/package/v2/quick_start.sh)"

See the Zero Degree video demonstration for more details…

Visit Tor Project Download WindTerm

Free tutorial • Open source tools • Educational purpose only

Qwen-Image-2512

Qwen-Image-2512 is officially open source! Free for everyone to use, with a ComfyUI native workflow download included!

Advanced AI text-to-image model with enhanced human realism and natural details

Qwen-Image-2512 is the December update to Qwen-Image's base text-to-image model, featuring enhanced human realism, finer natural details, and improved text rendering.

Qwen-Image-2512 is the December update to Qwen-Image's base text-to-image model. Compared to the base Qwen-Image model released in August, Qwen-Image-2512 offers significant improvements in image quality and realism.

Key Improvements in Qwen-Image-2512:
  • Enhanced Human Realism: Significantly reduces traces of "AI generation," greatly improving overall image realism, especially for human subjects.
  • Finer Natural Details: Significantly improves rendering details for landscapes, animal fur, and other natural elements.
  • Improved text rendering: Enhances the accuracy and quality of text elements, enabling better layout and more realistic multimodal (text + image) combinations.
Supported Aspect Ratios
Aspect Ratio Resolution
1:1 1328×1328
16:9 1664×928
9:16 928×1664
4:3 1472×1104
3:4 1104×1472
3:2 1584×1056
2:3 1056×1584
Environment Preparation Before Deployment:
Usage Tutorial
Step 1: Download ComfyUI

Download the latest version of ComfyUI: Click to go

If you have already installed the ComfyUI client, it is recommended to upgrade it to the latest version.

ComfyUI Download
Note

The official ComfyUI client requires an external network connection to download its necessary environment packages and AI models. If you are unable to download them, you can use a secure encrypted VPN:

Click to download ProtonVPN

Then, enable TUN global mode!

VPN Setup
Step 2: Download the JSON Workflow

Download the JSON workflow Click to get. Drag and drop it into the workflow; the required models will be downloaded automatically. If you don't have an external network environment, you'll need to use a VPN or proxy and enable TUN global mode!

Workflow Download Workflow Setup
Alternative: Free Online Platform

If your computer hardware does not support it, you can use the free online platform Qwen-Image-2512, which also generates unlimited content using the open-source Qwen-Image-2512.

Click here to try online

Online Platform
Manual Model Installation (Optional)

If you want to manually install models of other sizes, you can see the following:

Qwen-Image-2511 Open-source image editing models

For image editing, supports multiple images, and improves consistency

Model Download (No manual installation required)
Component File Name Description
Text Encoder qwen_2.5_vl_7b_fp8_scaled.safetensors Main text processing model
LoRa (Optional) Qwen-Image-Lightning-4steps-V1.0.safetensors For 4-step Lightning acceleration
Diffusion Model qwen_image_2512_fp8_e4m3fn.safetensors Recommended for most users
Diffusion Model qwen_image_2512_bf16.safetensors If you have enough VRAM and want higher image quality
VAE qwen_image_vae.safetensors Variational Autoencoder
Try Online Demo View on GitHub

Completely free • Open source • High quality • Multiple aspect ratios